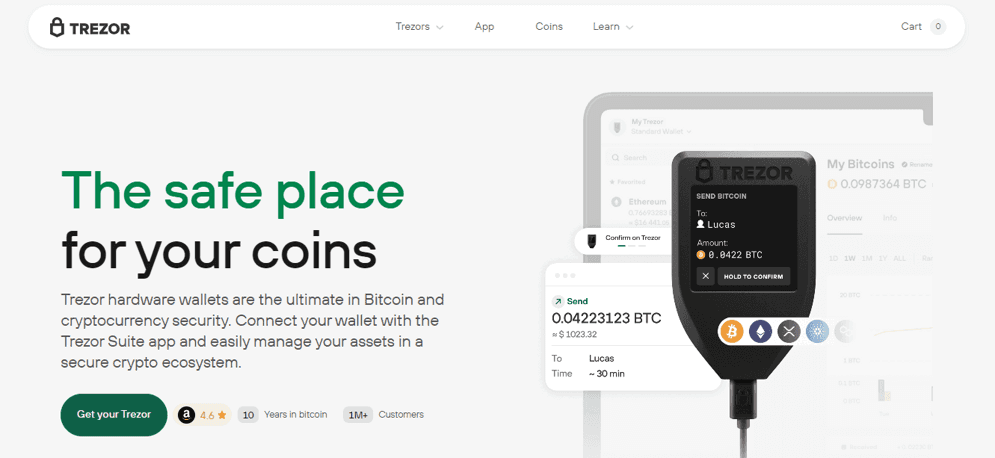
Trezor.io/start: The Official Guide to Setting Up Your Trezor Wallet
Trezor.io/start is the official setup page for users who have purchased a Trezor hardware wallet. Whether you’re using a Trezor Model One or a Trezor Model T, this page provides the necessary tools and instructions to help you begin your crypto security journey. Since Trezor devices store private keys offline, following the setup steps correctly is essential for maximum protection of your digital assets.
This article explains how Trezor.io/start works, what you can expect during the setup process, and the best practices to keep your wallet secure.
What Is Trezor.io/start?
Trezor.io/start is a dedicated webpage created by Trezor to guide new users through the initial setup of their hardware wallet. It provides:
Software downloads
Device activation instructions
Firmware installation
PIN and recovery seed setup
Security recommendations
Links to Trezor Suite, the official crypto management platform
Highlight: Trezor.io/start ensures that users complete setup only through official and safe channels, reducing the risk of fake websites and phishing scams.
Why Trezor.io/start Is Important
Setting up a hardware wallet involves sensitive steps, such as configuring your PIN and generating your recovery seed. Using unofficial websites or third-party instructions could expose your wallet to hackers. Trezor.io/start protects you by offering:
Verified software
Authentic firmware
Secure instructions
Step-by-step onboarding
Direct access to customer support resources
Highlight: Always begin your wallet setup through Trezor.io/start to avoid security risks.
Getting Started With Trezor.io/start
To begin the setup process, open your web browser and visit Trezor.io/start. Once the page loads, you will be guided through the following major steps:
Step 1: Choose Your Trezor Device
The page asks you to select your Trezor model:
Trezor Model One
Trezor Model T
This ensures that you receive instructions tailored to your device. Each model has slightly different screens and security options, so selecting the correct one is important.
Step 2: Download Trezor Suite
Trezor.io/start directs you to download Trezor Suite, the official desktop application for managing your cryptocurrency. It is available for:
Windows
macOS
Linux
Trezor Suite is necessary for secure interaction with your hardware wallet. It allows you to send and receive crypto, manage accounts, update firmware, and adjust security settings.
Highlight: Only download Trezor Suite through the link provided on Trezor.io/start.
Step 3: Connect Your Trezor
After installing Trezor Suite, open the application and connect your Trezor hardware wallet using a USB cable. The software will automatically recognize the device and display the next steps.
If this is your first time using the wallet, the device will require firmware installation.
Step 4: Update or Install Firmware
Your Trezor wallet may need the latest firmware before you can continue. Trezor Suite will walk you through the process:
Confirm firmware installation on the device
Wait for the update to complete
Restart the device if required
Firmware updates improve security and provide access to new features.
Highlight: Never install firmware from unofficial websites. Always update through Trezor Suite.
Step 5: Create Your PIN
Trezor.io/start instructs you to create a PIN for your device. This PIN protects your wallet from unauthorized access.
You must enter the PIN on the hardware device itself, not on your computer. The device displays a keypad pattern, and you select corresponding positions inside Trezor Suite.
Highlight: Your PIN is never shared online, making it highly secure.
Step 6: Generate Your Recovery Seed
The recovery seed is the most important part of setting up your Trezor. It is a list of 12, 18, or 24 words that serves as the only backup for your wallet.
Trezor.io/start emphasizes:
Write the seed down on paper
Never take a photo of it
Never store it digitally
Never share it with anyone
If your Trezor device is lost, stolen, or damaged, the recovery seed allows you to restore your crypto funds on a new device.
Highlight: If someone gets your recovery seed, they can access all your funds. Protect it at all costs.
Step 7: Access Your Wallet in Trezor Suite
Once your device is fully set up, you can open Trezor Suite and begin managing your cryptocurrency. The dashboard allows you to:
Add accounts for different coins
View your balances
Track portfolio performance
Send and receive funds
Enable passphrase protection
Adjust privacy settings
Activate Tor for anonymous connections
With your Trezor device connected, everything you do inside the software must be confirmed on the device, adding an important layer of security.
Security Tips From Trezor.io/start
For maximum safety, follow these practices:
Never share your recovery seed.
Keep your Trezor firmware updated.
Use a strong PIN and change it occasionally.
Only use the official Trezor Suite application.
Enable passphrase protection for higher security.
Turn on Tor inside Trezor Suite for privacy.
Store your recovery seed in a safe physical location.
Beware of phishing emails and fake support pages.
Highlight: Trezor support will never ask for your recovery seed or PIN.
Troubleshooting Through Trezor.io/start
If you face issues while setting up your wallet, the page provides links to solutions for:
Device not connecting
Firmware installation problems
PIN entry errors
Recovery seed concerns
App loading issues
Browser-related problems for the web version
In most cases, restarting the device or updating Trezor Suite solves common issues.
Conclusion
Trezor.io/start is the safest and most reliable way to begin your Trezor wallet setup. It walks you through downloading Trezor Suite, installing firmware, creating your PIN, and generating your recovery seed. By following the official steps, you protect your digital assets from online threats and ensure your hardware wallet is configured correctly.